Flashback Express 7
User Manual
Downloading and Installing
Recording a Video
Recorder Window
Recorder Settings
Selecting What To Record
Recording the Mouse Cursor
Starting and Stopping Recording
Recorder Control Bar
Advanced Recording Options
Annotating While Recording
Recording on a computer with dual GPUs
Previewing a Recording
Editing a Project
Editing Basics
Navigating the Project Editor
Working with Media
The Timeline
The Video Canvas
Styling Media
Editing Preferences
Exploring Media
Videos
Images
Animations
Shapes
Backgrounds
Text
Titles
Audio
Voiceovers
Subtitles
Blurs
Flashback Pro Movies
Applying Effects
Exporting
Freeze Frame
Licensing Flashback Express 7
Free vs Licensed Use
Purchasing a Flashback Express 7 License
Registering a Flashback Express 7 license
Upgrading From Pro 5 or Express 6
Managing Your Subscriptions
Feature Credits
Registering on an offline PC
Deploying a license to multiple PCs
License Troubleshooting
Misc.
How To Guides
Make a clip from a recording
Replace a voiceover
Record a facecam video
Schedule a recording session
Highlight the mouse cursor
Edit audio for an imported video
How To Move a Project to a New Computer
Record a clear voiceover
Flashback Express 7 Quick Start Guide
Flashback Express 7 FAQs
Flashback Express 6
User Manual
Downloading and Installing
Getting Setup to Record
The Recorder Window
Recording the Screen
Recording Windows and Regions
Recording Sound
Recording a Webcam
Recording the mouse cursor
Recording Settings
Recording
The Recorder Control Bar
Starting, Pausing and Stopping a Recording
Discarding or Restarting a Recording
Saving your recording
Scheduling a recording
Auto-trimming
Editing and Uploading
The Video Window
The Edit & Upload Window
Making a Clip
Uploading a Video
Exporting to other formats
Exporting Audio
Adding Subtitles
Licensing
Flashback Express Free vs Licenced
Purchasing a Flashback Express 6 license
Registering a Flashback Express 6 license
Registering Flashback Express 6 on an offline PC
Deploying a Flashback Express 6 license to multiple PCs
Flashback Express License 6 Troubleshooting
Feature Credits for Transcrptions
Misc.
How To Guides
How to record a facecam video
How to make a clip
How to schedule a recording session
How to capture the mouse cursor
Flashback Express 6 Quick Start Guide
Flashback Express 6 FAQs
Camigo
User Manual
Getting Started
Camigo System Requirements
Downloading and installing
Setting up Camigo
Checking for Updates
Camigo Settings
Using Camigo
Customizing your video
Licensing
Support
Camigo Quick Start Guide
Camigo FAQs
Video Converter
User Manual
Getting Setup
Video Converter System Requirements
Downloading and installing Video Converter
Preferences
Free Trial
Using Video Converter
Converting Format
Format settings
Turbo Conversion
Creating Clips
Cropping a video
Applying Effects
Adding Watermarks
Changing Speed
Inserting Subtitles
Licensing Video Converter
Video Converter Quick Start Guide
Video Converter FAQs
- All Categories
- Camigo
- User Manual
- Getting Started
- Setting up Camigo
Setting up Camigo
Updated
by Gareth Casey
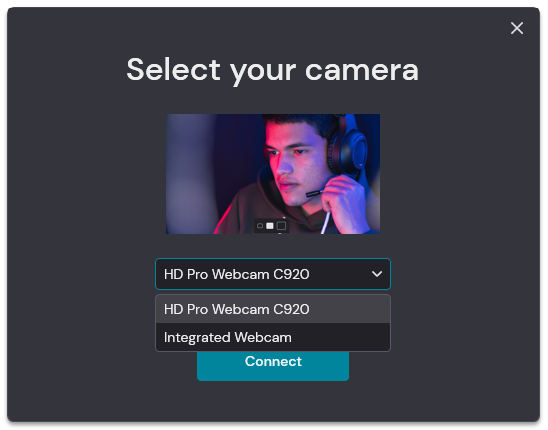
When you launch Camigo for the first time, you will need to select which webcam it is going to use.
If you only have one available webcam, the choice is easy, but if you have multiple webcams (for example, a laptop with a built-in webcam and an external USB webcam), take a moment to make sure the correct one is selected.

If the webcam you select is already in-use by another app, such as the video call app that you want to use Camigo with (Skype, Zoom, Teams, etc), Camigo will not be able to get the video from that webcam. Close the app that is using the webcam (or select a different webcam, if one is available) and you will then be able to get the webcam's video in Camigo. If you had to close your video call app, you can then restart it.
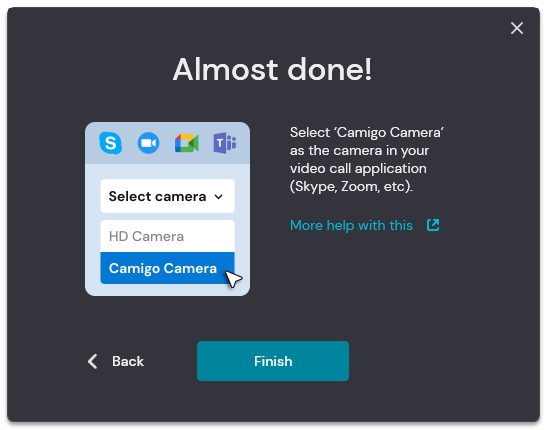
Camigo is then ready to use, so you just need to select Camigo Camera as the webcam in whichever app you will be using to make your video calls. If Camigo is not selected in your video call app, other participants will just see your regular webcam video instead.
To fully utilize all of Camigo's features you will also want to select Camigo Audio as the microphone in your video call app, which will allow you to include audio with your looped videos.

