Flashback Express 7
User Manual
Downloading and Installing
Recording a Video
Recorder Window
Recorder Settings
Recording the Mouse Cursor
Starting and Stopping Recording
Recorder Control Bar
Advanced Recording Options
Annotating While Recording
Selecting What To Record
Recording on a computer with dual GPUs
Previewing a Recording
Editing a Project
Editing Basics
Navigating the Project Editor
Working with Media
The Timeline
The Video Canvas
Styling Media
Editing Preferences
Exploring Media
Videos
Images
Animations
Shapes
Backgrounds
Text
Titles
Audio
Voiceovers
Subtitles
Blurs
Flashback Pro Movies
Applying Effects
Exporting
Freeze Frame
Licensing Flashback Express 7
Free vs Licensed Use
Purchasing a Flashback Express 7 License
Registering a Flashback Express 7 license
Upgrading From Pro 5 or Express 6
Managing Your Subscriptions
Feature Credits
Registering on an offline PC
Deploying a license to multiple PCs
License Troubleshooting
Misc.
How To Guides
Make a clip from a recording
Replace a voiceover
Record a facecam video
Schedule a recording session
Highlight the mouse cursor
Edit audio for an imported video
How To Move a Project to a New Computer
Record a clear voiceover
Flashback Express 7 Quick Start Guide
Flashback Express 7 FAQs
Flashback Express 6
User Manual
Downloading and Installing
Getting Setup to Record
The Recorder Window
Recording the Screen
Recording Windows and Regions
Recording Sound
Recording a Webcam
Recording the mouse cursor
Recording Settings
Recording
The Recorder Control Bar
Starting, Pausing and Stopping a Recording
Discarding or Restarting a Recording
Saving your recording
Scheduling a recording
Auto-trimming
Editing and Uploading
The Video Window
The Edit & Upload Window
Making a Clip
Uploading a Video
Exporting to other formats
Exporting Audio
Adding Subtitles
Licensing
Flashback Express Free vs Licenced
Purchasing a Flashback Express 6 license
Registering a Flashback Express 6 license
Registering Flashback Express 6 on an offline PC
Deploying a Flashback Express 6 license to multiple PCs
Flashback Express License 6 Troubleshooting
Feature Credits for Transcrptions
Misc.
How To Guides
How to record a facecam video
How to make a clip
How to schedule a recording session
How to capture the mouse cursor
Flashback Express 6 Quick Start Guide
Flashback Express 6 FAQs
Camigo
User Manual
Getting Started
Camigo System Requirements
Downloading and installing
Setting up Camigo
Checking for Updates
Camigo Settings
Using Camigo
Customizing your video
Licensing
Support
Camigo Quick Start Guide
Camigo FAQs
Video Converter
User Manual
Getting Setup
Video Converter System Requirements
Downloading and installing Video Converter
Preferences
Free Trial
Using Video Converter
Converting Format
Format settings
Turbo Conversion
Creating Clips
Cropping a video
Applying Effects
Adding Watermarks
Changing Speed
Inserting Subtitles
Licensing Video Converter
Video Converter Quick Start Guide
Video Converter FAQs
Table of Contents
Images

If you want to add an Image to your video project, you can either import any image that you already have or you can search the library of stock Images that are provided to you in Flashback Express 7.
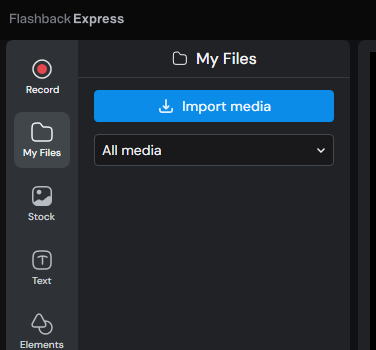
Adding An Imported Image
Before adding your Image to your project, you will first need to import it into your My Files. Simply click the Import Media button at the top of the My Files tab of the Media Panel and the select the file from your computer. It will then be added to your My Files.
You can then add your Image to your project by dragging and dropping it from My Files on to either the Canvas or Timeline. Or you can click Image's thumbnail to add it to the Timeline.
To the Canvas
If the Image is dropped on to the Canvas, the Image will appear in the exact spot on the Canvas where it was dropped and it will appear on top of any other objects that have already been added to the project.
An Image object will also appear on the Timeline beginning at the current frame with a default display duration of 10 seconds.
To the Timeline
If the Image is dragged on to the Timeline, the Image object will begin at whatever time it was dropped at. Or, if the Image is added by clicking its thumbnail, the Image will be added to the Timeline at the current frame.
In either case, the Image that appears on the Canvas will be positioned in the default position in the center of the Canvas.
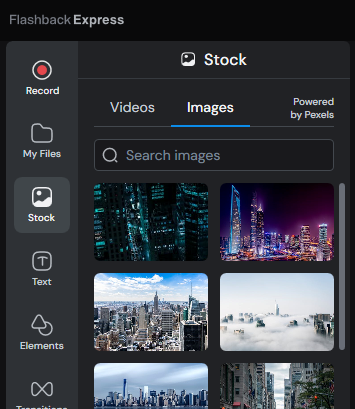
Adding a Stock Image
If you need to find an Image because you don't already have something suitable, you can search the library of stock images by going to the Stock section of the Media Panel and then switching to the Images tab to search for an Image.
To add an Image from your Image search, you can either simply drag and drop it on to either the Canvas or Timeline or click the Image's thumbnail.
Resizing and Cropping Images
Images can be resized by clicking and dragging the corners of the Image. The proportions of the Image will be locked when resizing, so it will always increase in height and width together to maintain the correct aspect ratio.
Alternatively, clicking and dragging on the edges of the Image will crop the Image down instead of resizing it. This allows you to trim the Image if you do not want to show all of it
Finally, instead of manually resizing an Image, you can either set it to fit to or fill the entire Canvas by clicking the relevant button in the Style panel while the Image is selected. When fitting to the Canvas, the Image will be made as large as possible without cropping any of it, whereas filling the Canvas will make the Image large enough to cover the entire Canvas even if that means part of the Image get crops off by the edge of the Canvas.
Rotating and Flipping Images
Images can be rotated by clicking and dragging the  icon to rotate the image.
Or the Image can be flipped horizontally or vertically by clicking the  and
and  buttons in the Style panel while the Image is selected.
Changing Image Duration
Image objects will have a default duration of 10 seconds but this can be adjusted by clicking and dragging either end of the timeline object to extend or shorten it.
Customizing an Image style
When an Image is selected, either on the Canvas or on the Timeline, it's style properties will appear on the Image tab of the Style Panel allowing you to custom the following:
Position - Quickly set the vertical alignment of the Image to the top, center or bottom of the Video Canvas and the horizontal alignment to the left, center or right of the Video Canvas.
Transform - Flip the Image either vertically or horizontally or resize it to fit for fill the Video Canvas.
Opacity - Make your Image appear transparent by reducing the Opacity. The lower the opacity, the more that you will be able to see through the Image.
Corners - Increase to add curved corners to the image. The higher the value, the larger the radius of the curved corners.
Applying Animations
When an Image is selected, you can also add animations for how it will appear and disappear by changing from the Image tab to the Animation tab in the Style panel. Animations include making the video fade, slide or zoom.
Separate animations can be applied for how the video will appear using the In option and how it will disappear using the Out option with the Duration slider at the bottom of the tab setting how long each animation will be applied for.