Flashback Express 7
User Manual
Downloading and Installing
Recording a Video
Recorder Window
Recorder Settings
Selecting What To Record
Recording the Mouse Cursor
Starting and Stopping Recording
Recorder Control Bar
Advanced Recording Options
Annotating While Recording
Recording on a computer with dual GPUs
Previewing a Recording
Editing a Project
Editing Basics
Navigating the Project Editor
Working with Media
The Timeline
The Video Canvas
Styling Media
Editing Preferences
Exploring Media
Videos
Images
Animations
Shapes
Backgrounds
Text
Titles
Audio
Voiceovers
Subtitles
Blurs
Flashback Pro Movies
Applying Effects
Exporting
Freeze Frame
Licensing Flashback Express 7
Free vs Licensed Use
Purchasing a Flashback Express 7 License
Registering a Flashback Express 7 license
Upgrading From Pro 5 or Express 6
Managing Your Subscriptions
Feature Credits
Registering on an offline PC
Deploying a license to multiple PCs
License Troubleshooting
Misc.
How To Guides
Make a clip from a recording
Replace a voiceover
Record a facecam video
Schedule a recording session
Highlight the mouse cursor
Edit audio for an imported video
How To Move a Project to a New Computer
Record a clear voiceover
Flashback Express 7 Quick Start Guide
Flashback Express 7 FAQs
Flashback Express 6
User Manual
Downloading and Installing
Getting Setup to Record
The Recorder Window
Recording the Screen
Recording Windows and Regions
Recording Sound
Recording a Webcam
Recording the mouse cursor
Recording Settings
Recording
The Recorder Control Bar
Starting, Pausing and Stopping a Recording
Discarding or Restarting a Recording
Saving your recording
Scheduling a recording
Auto-trimming
Editing and Uploading
The Video Window
The Edit & Upload Window
Making a Clip
Uploading a Video
Exporting to other formats
Exporting Audio
Adding Subtitles
Licensing
Flashback Express Free vs Licenced
Purchasing a Flashback Express 6 license
Registering a Flashback Express 6 license
Registering Flashback Express 6 on an offline PC
Deploying a Flashback Express 6 license to multiple PCs
Flashback Express License 6 Troubleshooting
Feature Credits for Transcrptions
Misc.
How To Guides
How to record a facecam video
How to make a clip
How to schedule a recording session
How to capture the mouse cursor
Flashback Express 6 Quick Start Guide
Flashback Express 6 FAQs
Camigo
User Manual
Getting Started
Camigo System Requirements
Downloading and installing
Setting up Camigo
Checking for Updates
Camigo Settings
Using Camigo
Customizing your video
Licensing
Support
Camigo Quick Start Guide
Camigo FAQs
Video Converter
User Manual
Getting Setup
Video Converter System Requirements
Downloading and installing Video Converter
Preferences
Free Trial
Using Video Converter
Converting Format
Format settings
Turbo Conversion
Creating Clips
Cropping a video
Applying Effects
Adding Watermarks
Changing Speed
Inserting Subtitles
Licensing Video Converter
Video Converter Quick Start Guide
Video Converter FAQs
Table of Contents
- All Categories
- Flashback Express 6
- User Manual
- Editing and Uploading
- The Edit & Upload Window
The Edit & Upload Window
Updated
by Gareth Casey
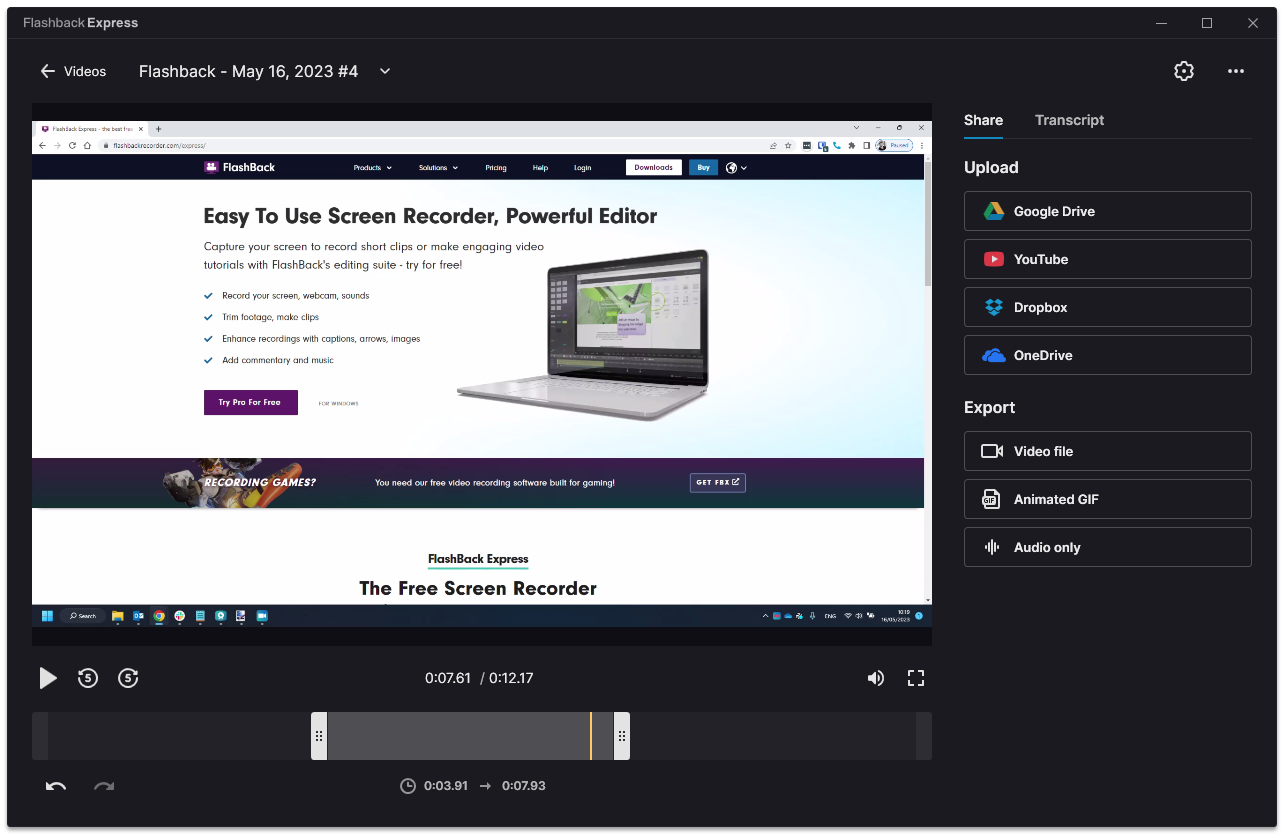
The Edit & Upload Window allows you to trim your saved videos to remove unwanted content at the start and end, upload your video to popular video and file sharing platforms and export the audio from your video.

Click the  button in the top left corner to return to the Video Window.
Click the  button in the top right corner to open the Recorder Settings (see Recorder Settings for more details).
Click the  button in the top right corner to open the Help tab of the Recorder Settings.
The Name of the video that you are viewing is displayed above the Playback Window.

Clicking the  button next to the video name lets you:
- Rename the video
- Open file location to where the video is currently saved
- View the video's File Information:
- The Date when the video was recorded
- The Duration of the video
- The Dimensions of the video (the resolution)
- The Size of the video file
- The Frame Rate of the video
- Delete the video file from your computer.
Playback Window
The majority of the Edit & Upload Window is filled with the Playback Window where you can review your video.
The Playback Controls for the video will appear below the Playback Window when you move your mouse cursor over the Playback Window.
The Playback Controls allow you to play/pause the video, check the current time in the video and the overall duration of the video and jump forwards or backwards by 5 seconds.
Timeline
Below the Playback Window is the Timeline. The current position on the Timeline is indicated by a yellow vertical line. Click on any other position on the Timeline to jump to the time in the video.

The grey Clip Selection Bar that fills the Timeline indicates what section of the video is currently selected for uploading and saving. Initially, the whole Timeline will be selected but you can trim the ends off the video by dragging the handles at either end of the Clip Selection Bar to remove unwanted content. See Making a Clip for more details.
When a clip is selected by adjusting the Clip Selection Bar, the start and end times of the clip will be displayed below the Timeline.
Upload or save your video
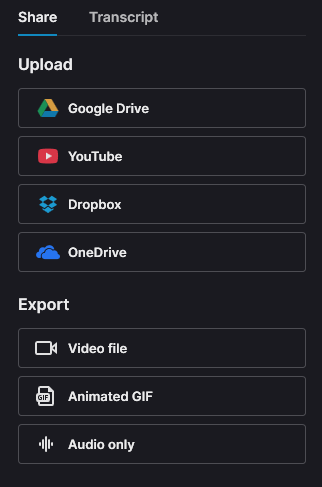
The Share tab contains the Upload and Export options which allow you to upload and share you video on several popular video and file sharing platforms.

If you have used the clip selection bar to trim your video, only the selected clip will be uploaded, not the full video. Or you can save the selected clip as a new video file on your computer.
- Google Drive - Shares the video file on Google Drive
- YouTube - Uploads the video to YouTube
- Dropbox - Shares the video file on Dropbox
- OneDrive - Uploads the video to OneDrive
- Video file - Save the selected clip as a MP4, MKV, AVI or WMV file
- Animated GIF - Save the selected clip as an animated GIF file (it recommended to keep clips under 15 seconds)
- Audio only - Save the audio from your video as an MP3 file
Subtitles
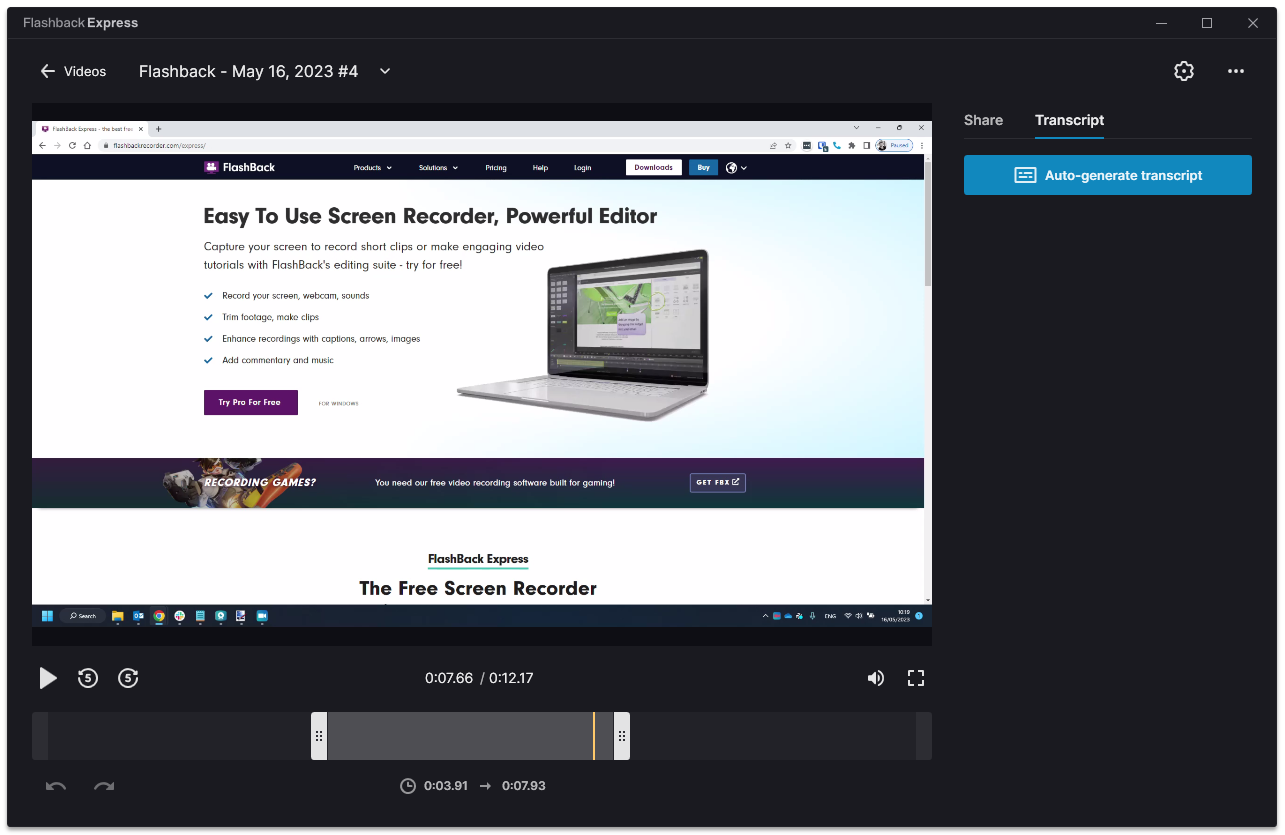
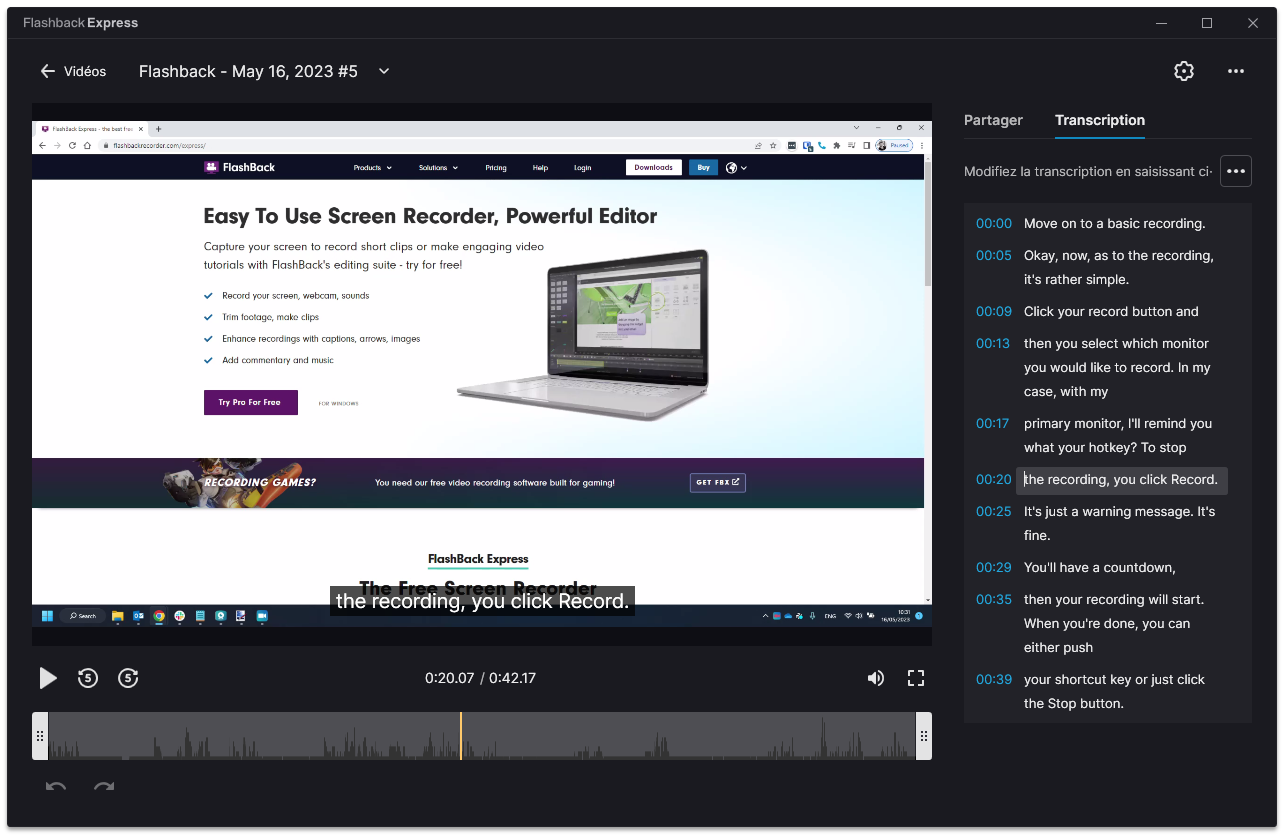
The Transcript tab allows you to generate subtitles for any speech that is in your recorded video.
To create your subtitles, click the Auto-generate transcript button and then select the language of the speech that is in the video. The transcription features does not perform any translation so it is best to only ever select the langauge that is actually spoken in the video.

The generated text will be displayed in the blocks that will be displayed on your video along with the timestamps of when that block will appear. If any of the auto-generated subtitles need correcting, simply click the relevant block of text and make the change

