Flashback Express 7
User Manual
Downloading and Installing
Recording a Video
Recorder Window
Recorder Settings
Selecting What To Record
Recording the Mouse Cursor
Starting and Stopping Recording
Recorder Control Bar
Advanced Recording Options
Annotating While Recording
Recording on a computer with dual GPUs
Previewing a Recording
Editing a Project
Editing Basics
Navigating the Project Editor
Working with Media
The Timeline
The Video Canvas
Styling Media
Editing Preferences
Exploring Media
Videos
Images
Animations
Shapes
Backgrounds
Text
Titles
Audio
Voiceovers
Subtitles
Blurs
Flashback Pro Movies
Applying Effects
Exporting
Licensing Flashback Express 7
Free vs Licensed Use
Purchasing a Flashback Express 7 License
Registering a Flashback Express 7 license
Upgrading From Pro 5 or Express 6
Managing Your Subscriptions
Feature Credits
Registering on an offline PC
Deploying a license to multiple PCs
License Troubleshooting
Misc.
How To Guides
Make a clip from a recording
Replace a voiceover
Record a facecam video
Schedule a recording session
Highlight the mouse cursor
Edit audio for an imported video
How To Move a Project to a New Computer
Record a clear voiceover
Flashback Express 7 Quick Start Guide
Flashback Express 7 FAQs
Flashback Express 6
User Manual
Downloading and Installing
Getting Setup to Record
The Recorder Window
Recording the Screen
Recording Windows and Regions
Recording Sound
Recording a Webcam
Recording the mouse cursor
Recording Settings
Recording
The Recorder Control Bar
Starting, Pausing and Stopping a Recording
Discarding or Restarting a Recording
Saving your recording
Scheduling a recording
Auto-trimming
Editing and Uploading
The Video Window
The Edit & Upload Window
Making a Clip
Uploading a Video
Exporting to other formats
Exporting Audio
Adding Subtitles
Licensing
Flashback Express Free vs Licenced
Purchasing a Flashback Express 6 license
Registering a Flashback Express 6 license
Registering Flashback Express 6 on an offline PC
Deploying a Flashback Express 6 license to multiple PCs
Flashback Express License 6 Troubleshooting
Feature Credits for Transcrptions
Misc.
How To Guides
How to record a facecam video
How to make a clip
How to schedule a recording session
How to capture the mouse cursor
Flashback Express 6 Quick Start Guide
Flashback Express 6 FAQs
Camigo
User Manual
Getting Started
Camigo System Requirements
Downloading and installing
Setting up Camigo
Checking for Updates
Camigo Settings
Using Camigo
Customizing your video
Licensing
Support
Camigo Quick Start Guide
Camigo FAQs
Video Converter
User Manual
Getting Setup
Video Converter System Requirements
Downloading and installing Video Converter
Preferences
Free Trial
Using Video Converter
Converting Format
Format settings
Turbo Conversion
Creating Clips
Cropping a video
Applying Effects
Adding Watermarks
Changing Speed
Inserting Subtitles
Licensing Video Converter
Video Converter Quick Start Guide
Video Converter FAQs
Table of Contents
- All Categories
- Camigo
- Camigo Quick Start Guide
Camigo Quick Start Guide
Updated
by Gareth Casey
Downloading and Installing
- Download Camigo from our download page.
- When Camigo has finished downloading, double click the downloaded file to install.
- Click Yes when the User Account Control popup appears.
- To install to the default location, click the Install button on the window that appears.

To choose a new location to install to, click Options in the bottom right corner of the window and then click the Change button next to where the installation folder is displayed. Then choose a new folder to install to.
Selecting your webcam and microphone
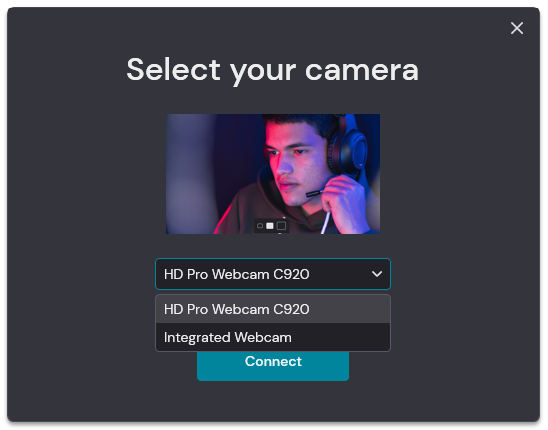
- When you launch Camigo for the first time, select which webcam you will use for your video calls in the drop down menu on the Select your camera window that appears.

- Click Connect and then Finish.
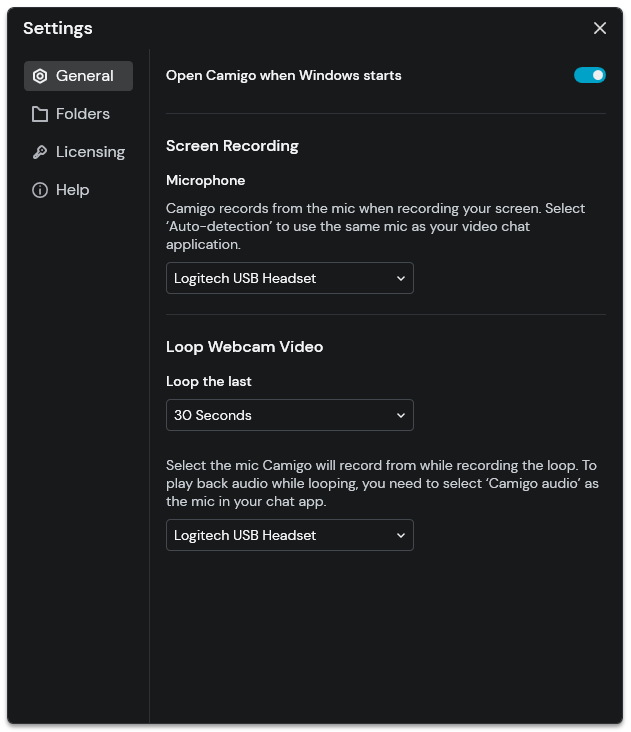
- When the Camigo window then appears, click the Settings button.
- Select the microphone that you will use to reocrd audio for looped videos and the microphone that will be captured for screen recordings.

Getting ready to chat
- Open your video call app and go to its Settings.
- Select Camigo Camera as the webcam that the video call app will use.
- Select Camigo Audio as the microphone that the video call app will use.
Personalising your settings
- Click the Settings button in the bottom corner of the Camigo window to open the Settings.
- For webcam loop videos, select the loop duration from the choices of 30 seconds, 1 minute or 2 minutes.
- If you didn't already set it, select the Mircophone that Camigo will use for audio in webcam loops.
Customize your video
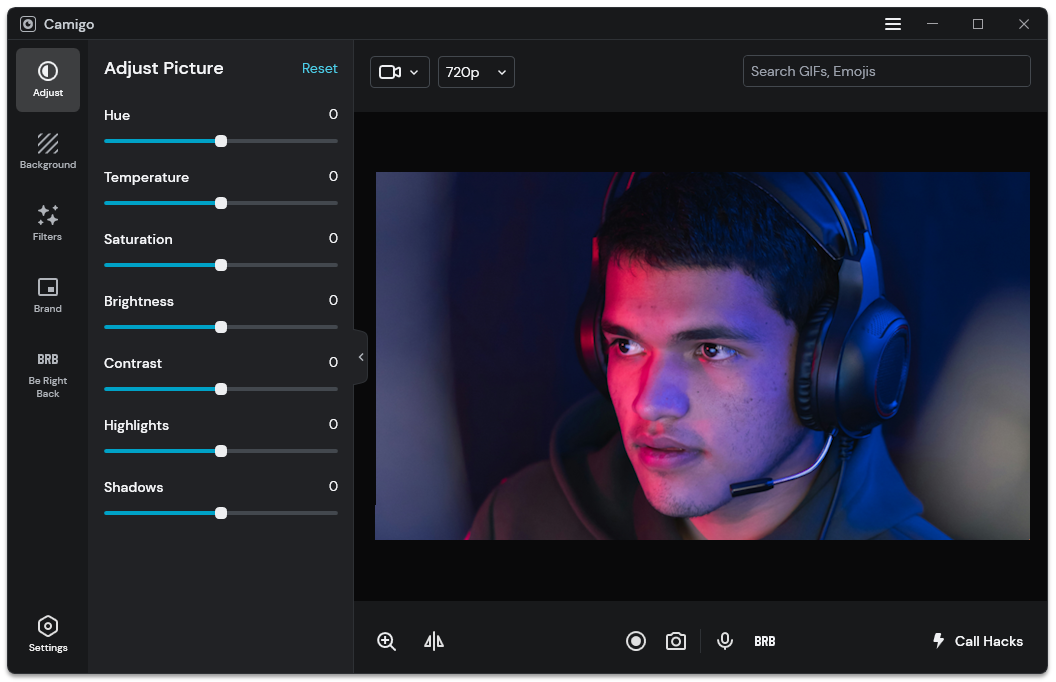
- Click on any of the tabs down the left of the Camigo window to open the customization panel to customize your webcam video.

Make a video call
You're now ready to make your first video call using Camigo. Simply get chatting with Zoom, Skype, Teams or any other video call app.
