Flashback Express 7
User Manual
Downloading and Installing
Recording a Video
Recorder Window
Recorder Settings
Selecting What To Record
Recording the Mouse Cursor
Starting and Stopping Recording
Recorder Control Bar
Advanced Recording Options
Annotating While Recording
Recording on a computer with dual GPUs
Previewing a Recording
Editing a Project
Editing Basics
Navigating the Project Editor
Working with Media
The Timeline
The Video Canvas
Styling Media
Editing Preferences
Exploring Media
Videos
Images
Animations
Shapes
Backgrounds
Text
Titles
Audio
Voiceovers
Subtitles
Blurs
Flashback Pro Movies
Applying Effects
Exporting
Licensing Flashback Express 7
Free vs Licensed Use
Purchasing a Flashback Express 7 License
Registering a Flashback Express 7 license
Upgrading From Pro 5 or Express 6
Managing Your Subscriptions
Feature Credits
Registering on an offline PC
Deploying a license to multiple PCs
License Troubleshooting
Misc.
How To Guides
Make a clip from a recording
Replace a voiceover
Record a facecam video
Schedule a recording session
Highlight the mouse cursor
Edit audio for an imported video
How To Move a Project to a New Computer
Record a clear voiceover
Flashback Express 7 Quick Start Guide
Flashback Express 7 FAQs
Flashback Express 6
User Manual
Downloading and Installing
Getting Setup to Record
The Recorder Window
Recording the Screen
Recording Windows and Regions
Recording Sound
Recording a Webcam
Recording the mouse cursor
Recording Settings
Recording
The Recorder Control Bar
Starting, Pausing and Stopping a Recording
Discarding or Restarting a Recording
Saving your recording
Scheduling a recording
Auto-trimming
Editing and Uploading
The Video Window
The Edit & Upload Window
Making a Clip
Uploading a Video
Exporting to other formats
Exporting Audio
Adding Subtitles
Licensing
Flashback Express Free vs Licenced
Purchasing a Flashback Express 6 license
Registering a Flashback Express 6 license
Registering Flashback Express 6 on an offline PC
Deploying a Flashback Express 6 license to multiple PCs
Flashback Express License 6 Troubleshooting
Feature Credits for Transcrptions
Misc.
How To Guides
How to record a facecam video
How to make a clip
How to schedule a recording session
How to capture the mouse cursor
Flashback Express 6 Quick Start Guide
Flashback Express 6 FAQs
Camigo
User Manual
Getting Started
Camigo System Requirements
Downloading and installing
Setting up Camigo
Checking for Updates
Camigo Settings
Using Camigo
Customizing your video
Licensing
Support
Camigo Quick Start Guide
Camigo FAQs
Video Converter
User Manual
Getting Setup
Video Converter System Requirements
Downloading and installing Video Converter
Preferences
Free Trial
Using Video Converter
Converting Format
Format settings
Turbo Conversion
Creating Clips
Cropping a video
Applying Effects
Adding Watermarks
Changing Speed
Inserting Subtitles
Licensing Video Converter
Video Converter Quick Start Guide
Video Converter FAQs
Table of Contents
- All Categories
- Flashback Express 6
- User Manual
- Getting Setup to Record
- Recording Windows and Regions
Recording Windows and Regions
Updated
by Gareth Casey
To record from your screen, the Screen option must be enabled.

Recording a region
To record just a certain region of your screen, click the arrow next to Screen and click Region in the menu that appears.
When Region is selected, the mouse cursor will change to the region selection cursor. Click and drag to mark the region you want to record.
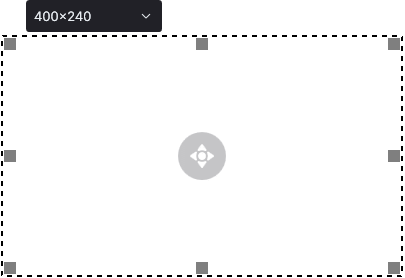
As you drag, a dashed frame will appear to indicate the region that is being selected. In the top left corner of the frame, the region control bar displays the current height and width of the frame.

Move the frame by clicking and dragging the handle in the centre of the frame.
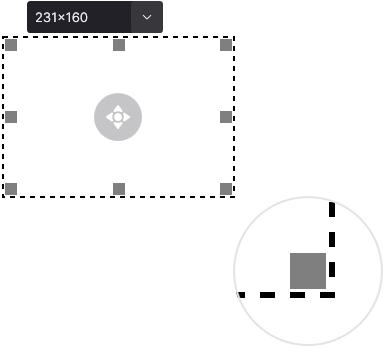
Resize the frame by clicking the resize boxes in the corners and along the edges of the frame. While dragging to resize the frame, a magnifying glass will appear to help you accurately drag the frame into position.

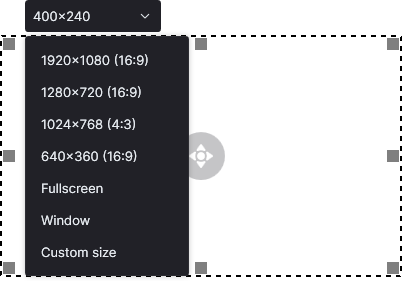
Or set the frame to a pre-defined size by clicking the arrow on the region control bar and selecting from the options that appear. For convenience, you can also switch to fullscreen or wIndow recording from here as well

 , go to the General tab and enable the Snap recording frame to edges which will allow the region frame to look for and snap to edges that are not necessarily on the outside of a window.
Click Start Recording to start recording the selected region.
Recording a window
You can set also set a region to match any window on your screen. Click the arrow next to Screen and click Window in the menu that appears.
As you move the mouse cursor around the screen, it will highlight windows that can be selected. When the window that you want to recorded is highlighted in red, click the left mouse button.
A dashed frame will appear around the border of the selected window. The region is not fixed to the window so you can resize and move the frame just like if you had used the Resize option. If you move the selected window, the frame will not move with it.
Click Start Recording to start recording from the selected window.
