Flashback Express 7
User Manual
Downloading and Installing
Recording a Video
Recorder Window
Recorder Settings
Recording the Mouse Cursor
Starting and Stopping Recording
Recorder Control Bar
Advanced Recording Options
Annotating While Recording
Selecting What To Record
Recording on a computer with dual GPUs
Previewing a Recording
Editing a Project
Editing Basics
Navigating the Project Editor
Working with Media
The Timeline
The Video Canvas
Styling Media
Editing Preferences
Exploring Media
Videos
Images
Animations
Shapes
Backgrounds
Text
Titles
Audio
Voiceovers
Subtitles
Blurs
Flashback Pro Movies
Applying Effects
Exporting
Freeze Frame
Licensing Flashback Express 7
Free vs Licensed Use
Purchasing a Flashback Express 7 License
Registering a Flashback Express 7 license
Upgrading From Pro 5 or Express 6
Managing Your Subscriptions
Feature Credits
Registering on an offline PC
Deploying a license to multiple PCs
License Troubleshooting
Misc.
How To Guides
Make a clip from a recording
Replace a voiceover
Record a facecam video
Schedule a recording session
Highlight the mouse cursor
Edit audio for an imported video
How To Move a Project to a New Computer
Record a clear voiceover
Flashback Express 7 Quick Start Guide
Flashback Express 7 FAQs
Flashback Express 6
User Manual
Downloading and Installing
Getting Setup to Record
The Recorder Window
Recording the Screen
Recording Windows and Regions
Recording Sound
Recording a Webcam
Recording the mouse cursor
Recording Settings
Recording
The Recorder Control Bar
Starting, Pausing and Stopping a Recording
Discarding or Restarting a Recording
Saving your recording
Scheduling a recording
Auto-trimming
Editing and Uploading
The Video Window
The Edit & Upload Window
Making a Clip
Uploading a Video
Exporting to other formats
Exporting Audio
Adding Subtitles
Licensing
Flashback Express Free vs Licenced
Purchasing a Flashback Express 6 license
Registering a Flashback Express 6 license
Registering Flashback Express 6 on an offline PC
Deploying a Flashback Express 6 license to multiple PCs
Flashback Express License 6 Troubleshooting
Feature Credits for Transcrptions
Misc.
How To Guides
How to record a facecam video
How to make a clip
How to schedule a recording session
How to capture the mouse cursor
Flashback Express 6 Quick Start Guide
Flashback Express 6 FAQs
Camigo
User Manual
Getting Started
Camigo System Requirements
Downloading and installing
Setting up Camigo
Checking for Updates
Camigo Settings
Using Camigo
Customizing your video
Licensing
Support
Camigo Quick Start Guide
Camigo FAQs
Video Converter
User Manual
Getting Setup
Video Converter System Requirements
Downloading and installing Video Converter
Preferences
Free Trial
Using Video Converter
Converting Format
Format settings
Turbo Conversion
Creating Clips
Cropping a video
Applying Effects
Adding Watermarks
Changing Speed
Inserting Subtitles
Licensing Video Converter
Video Converter Quick Start Guide
Video Converter FAQs
Table of Contents
Zooms & Pans

Zoom effects can be added to any visual object (video, image, GIF, shapes, etc) to change how large the object appears within a project. Pans can also be applied to adjust what part of the eobject is zoomed in on.
Adding a Zoom
You can add a Zoom to an object by going to the Zoom and Pan tab of the Media Panel and then dragging and dropping the Zoom & Pan effect onto the timeline object that you want to apply it to.
When the Zoom marker is selected on the timeline object, a preview of the video will be displayed in the Style Panel on the right of the screen. The frame placed on top of the preview image will indicate where the image will zoom in to. Initially the frame will be set to either the full image size but the frame can be resized and moved to set the new zoom level.
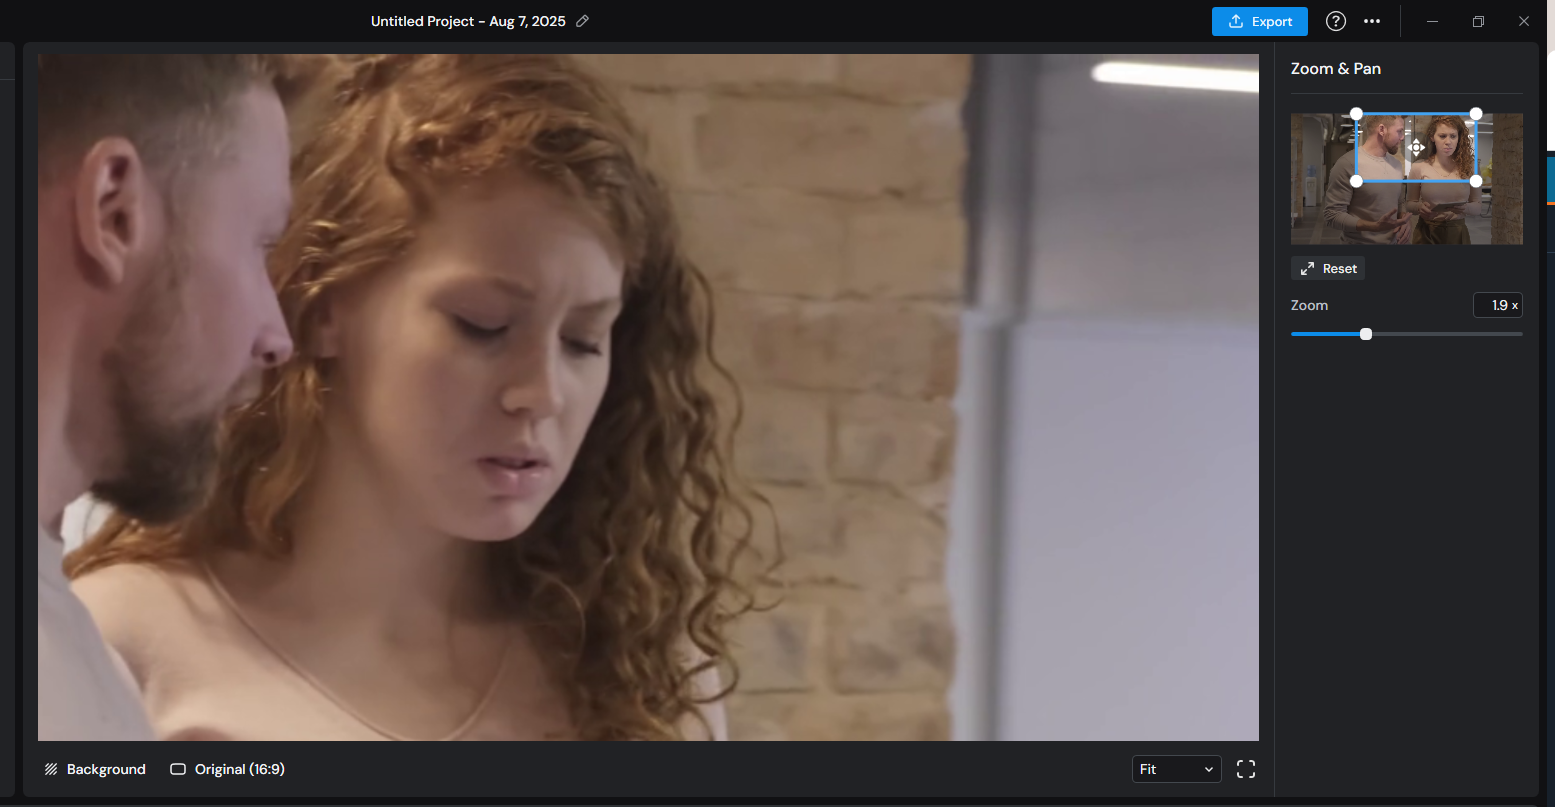
To return to the default zoom level, simply click the Reset button or set the zoom value to 1.0.
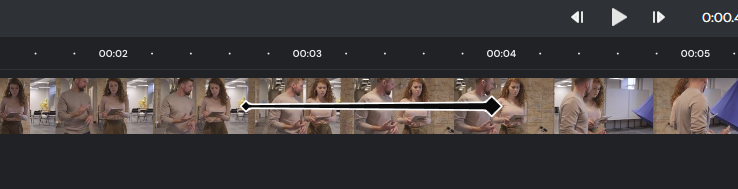
You can set the timing for when the zoom transition will begin and end by dragging the markers at each end of the zoom arrow that is added on top of the timeline object. If you want the zoom to be instantaneous, simply drag the markers on top of each other
Adding a Pan
If you add multiple Zoom & Pan effects to a single timeline object, you can use those to pan around the image instead of just simply zooming. Each additional Zoom & Pan effect will start withthe zoom level set to the zoom level of the previous Zoom & Pan effect.
To create a pan, simply move the zoom frame on the preview in the right side panel without changing the size of it.